https://codebeautify.org/jsonviewer
Best JSON Viewer and JSON Beautifier Online
Online JSON Viewer, JSON Beautifier and Formatter to beautify and tree view of JSON data - It works as JSON Pretty Print to pretty print JSON data.
codebeautify.org
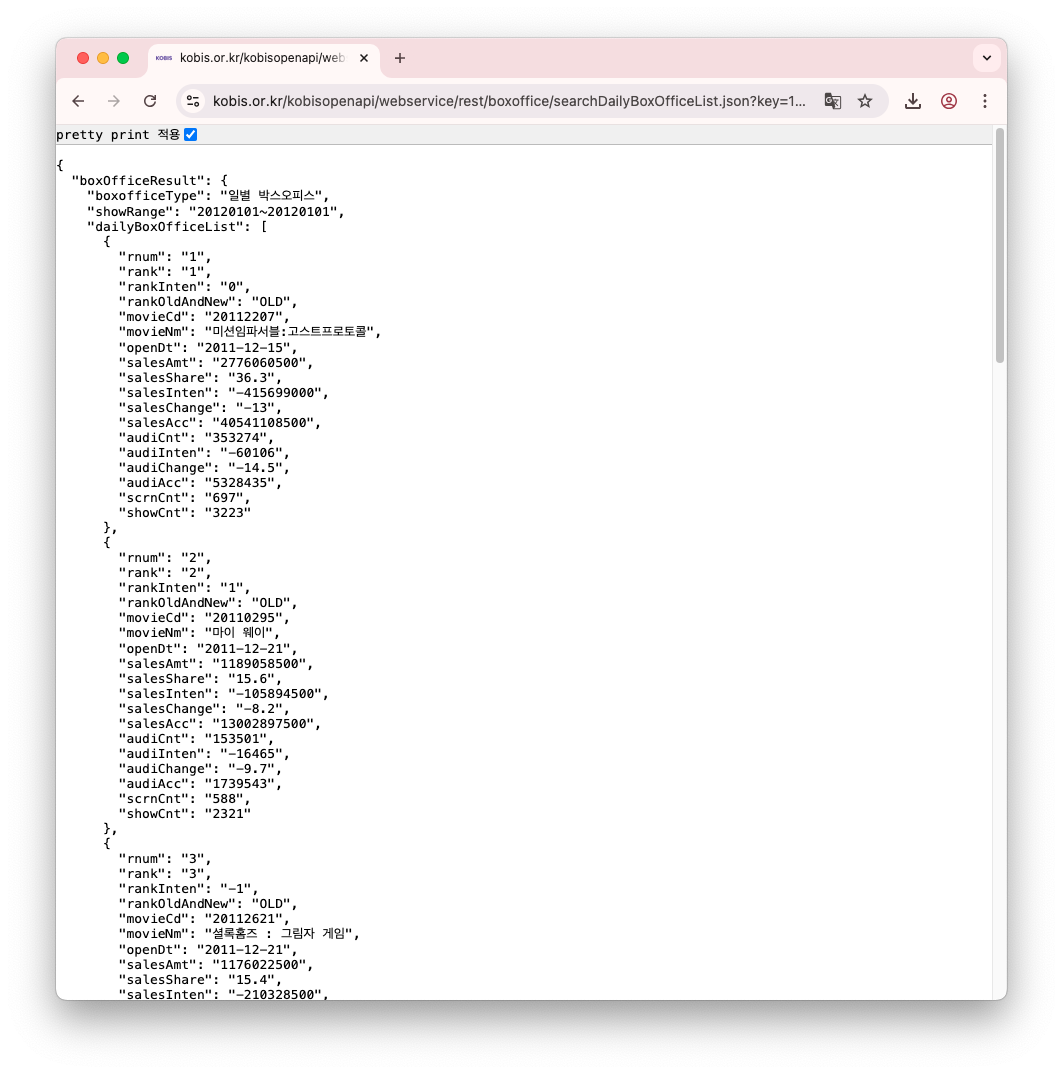
JSON(JavaScript Object Notation)

오픈 API (Open API)

Open API를 이용한 앱 개발 단계
- 원하는 정보를 제공하는 웹 서비스와 사용할 Open API 선정
- Open API 사용을 위한 신청과 인증키 발급
- 네트워크를 통해 데이터 요청
- 받은 데이터를 파싱하여 앱에서 사용
Add New Constraints : Table View를 화면 전체를 채움

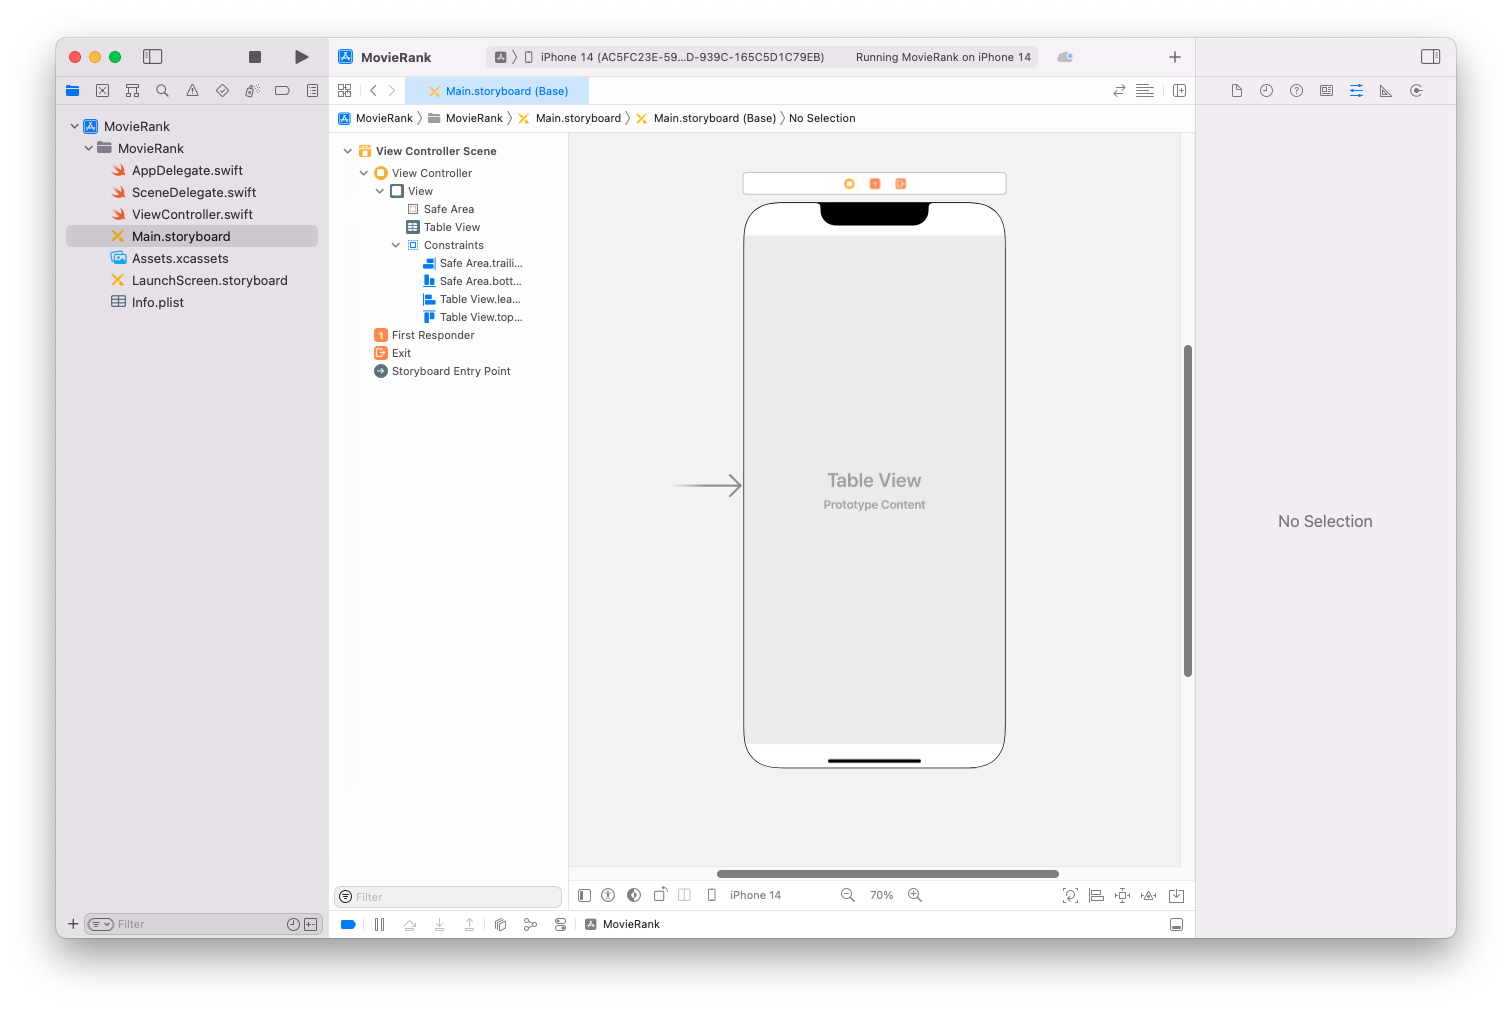
Table View outlet 설정 : table
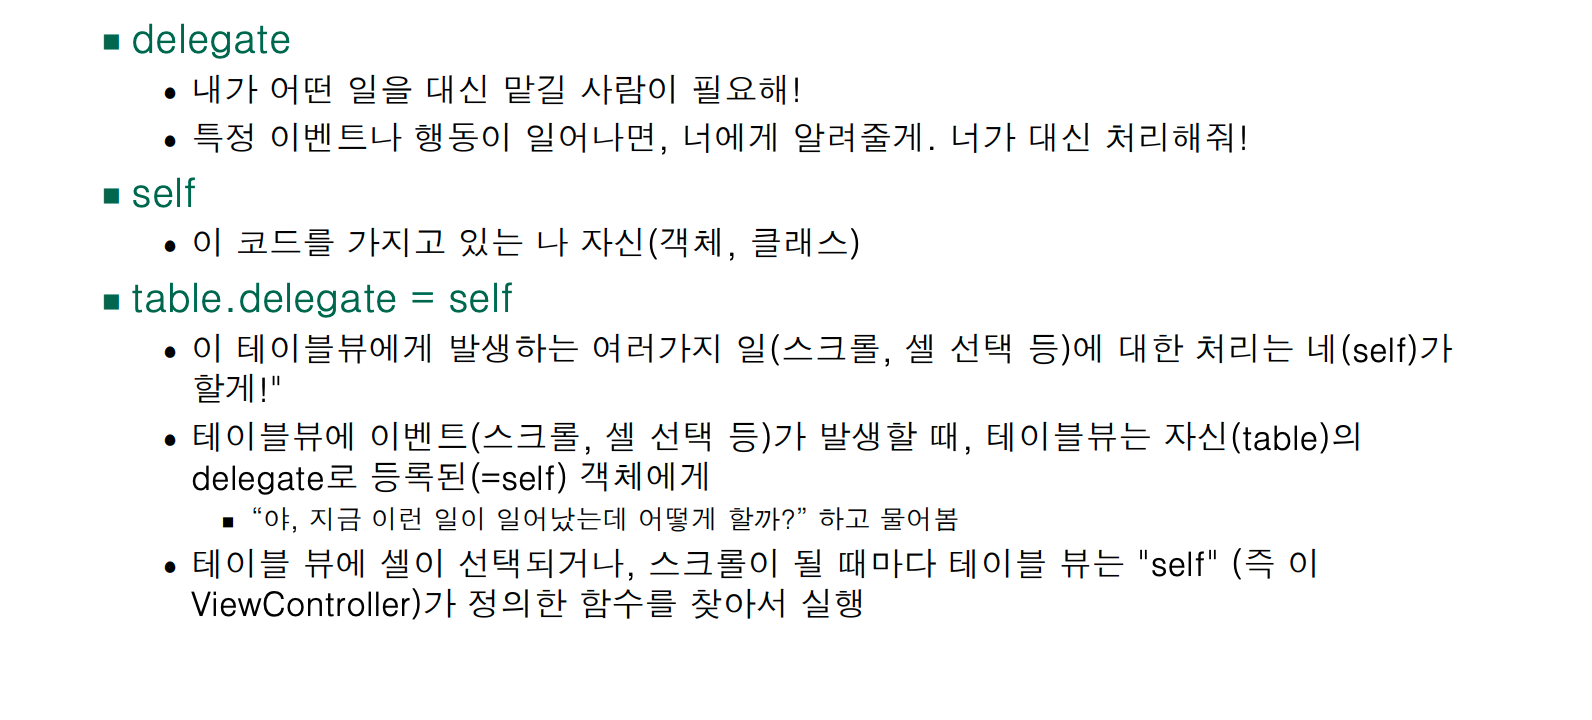
테이블뷰는 2개의 protocol 도움을 받아서 하므로 채택

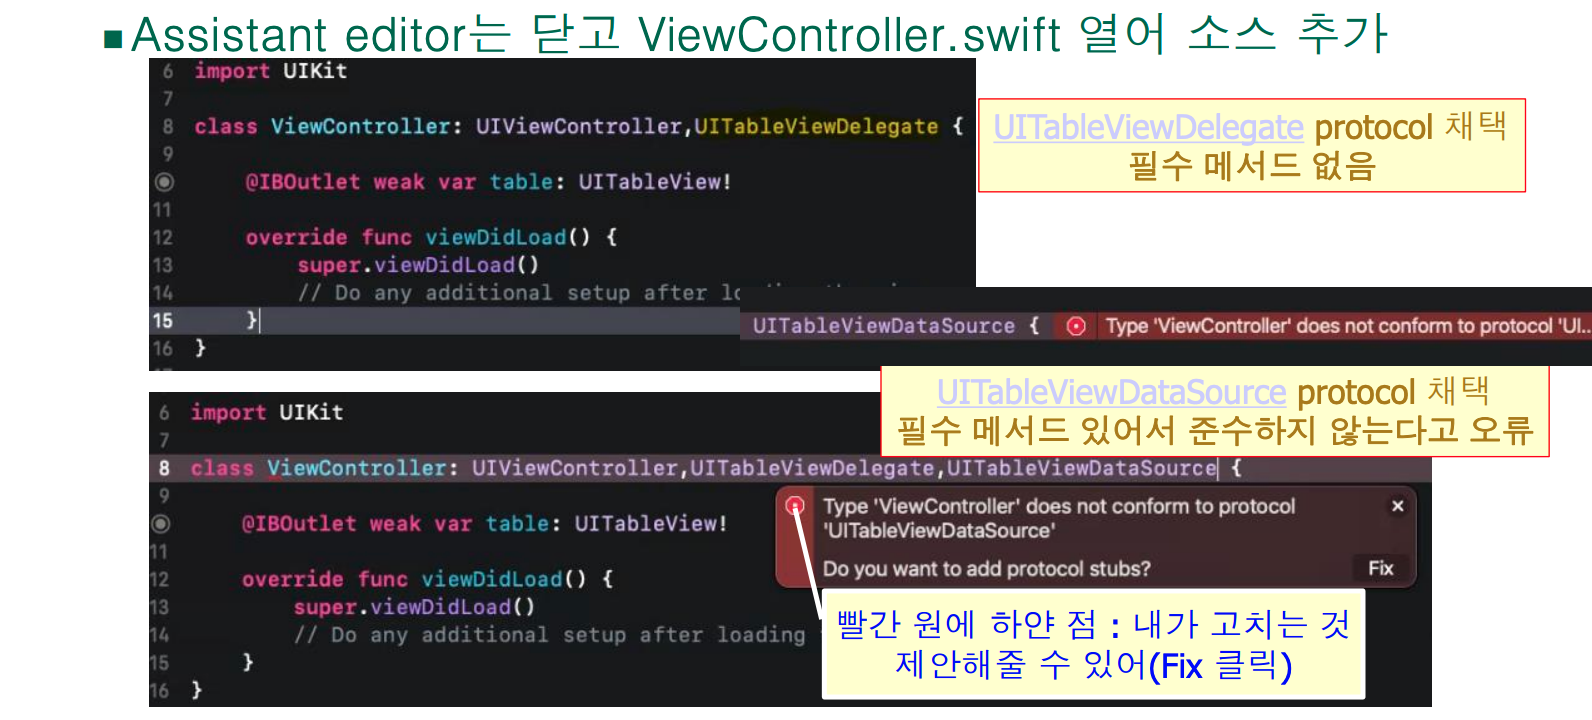
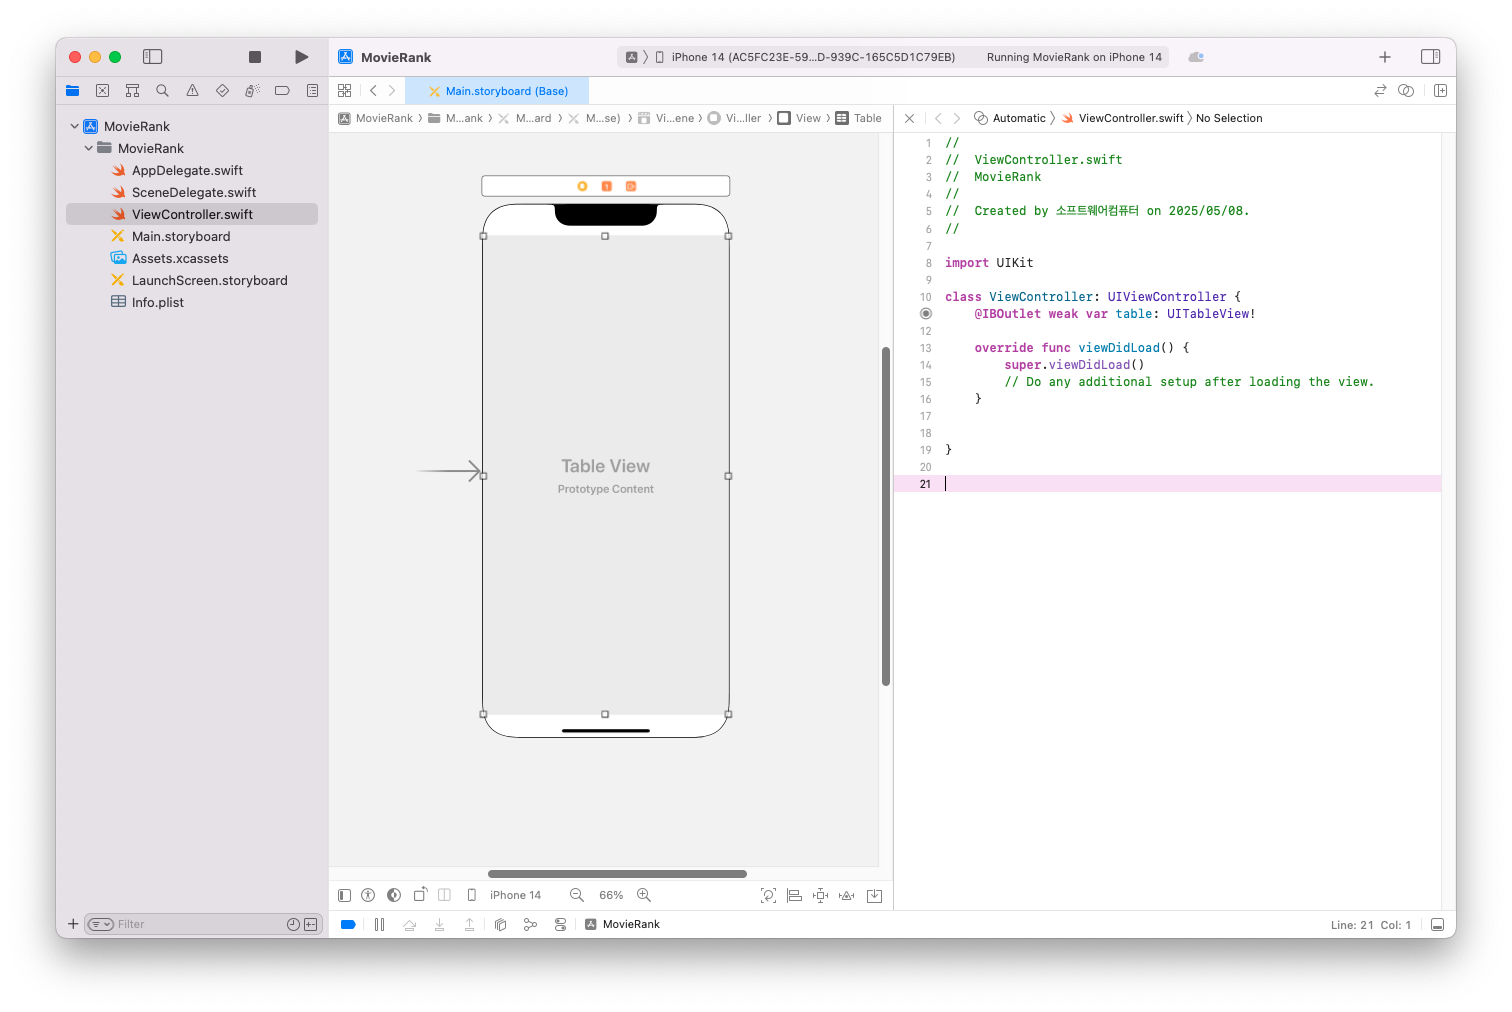
ViewController.swift 파일 수정

table.delegate = self
//
//  ViewController.swift
//  MovieRank
//
//  Created by 소프트웨어컴퓨터 on 2025/05/08.
//

import UIKit

class ViewController: UIViewController, UITableViewDelegate, UITableViewDataSource {
    func tableView(_ tableView: UITableView, numberOfRowsInSection section: Int) -> Int {
        return 5
    }

    func tableView(_ tableView: UITableView, cellForRowAt indexPath: IndexPath) -> UITableViewCell {
        return UITableViewCell()
    }

    @IBOutlet weak var table: UITableView!

    override func viewDidLoad() {
        super.viewDidLoad()
        table.dataSource = self
        table.delegate = self
    }
}

소스 설명
//
//  ViewController.swift
//  MovieRank
//
//  Created by 소프트웨어컴퓨터 on 2025/05/08.
//

import UIKit // UIKit 프레임워크 불러오기 (iOS UI 요소 사용 가능)

class ViewController: UIViewController, UITableViewDelegate, UITableViewDataSource {
    // ViewController는 화면을 담당하는 클래스
    // UITableViewDelegate, UITableViewDataSource는 테이블 뷰의 행동과 데이터 처리 역할을 맡음

    @IBOutlet weak var table: UITableView!
    // 스토리보드에서 만든 테이블 뷰를 코드와 연결함 (@IBOutlet)
    // weak: 메모리 순환 방지를 위한 약한 참조

    override func viewDidLoad() {
        super.viewDidLoad()
        // 화면이 처음 로드될 때 한 번 실행되는 함수

        table.dataSource = self
        // 테이블의 데이터 제공자는 이 클래스 자신(ViewController)임

        table.delegate = self
        // 테이블의 행동(터치 등) 처리자도 이 클래스 자신
    }

    func tableView(_ tableView: UITableView, numberOfRowsInSection section: Int) -> Int {
        // 각 섹션에 몇 개의 줄(셀)을 표시할지 설정하는 함수
        return 5 // 섹션마다 5개의 줄을 표시
    }

    func tableView(_ tableView: UITableView, cellForRowAt indexPath: IndexPath) -> UITableViewCell {
        // 각 줄에 어떤 셀을 표시할지 설정하는 함수
        // indexPath는 현재 줄과 섹션 번호를 알려줌
        return UITableViewCell() // 기본 빈 셀 하나를 만들어 반환
    }

    func numberOfSections(in tableView: UITableView) -> Int {
        // 테이블을 몇 개의 섹션(덩어리)으로 나눌지 설정하는 함수
        return 3 // 섹션 3개 생성
    }
}
열거형 UITableViewCell.CellStyle에 내가 원하는 디자인이 없어요

내가 Cell을 직접 디자인하기 위해 Table View Cell 추가
cell을 직접 만들면 identifier 필요: myCell

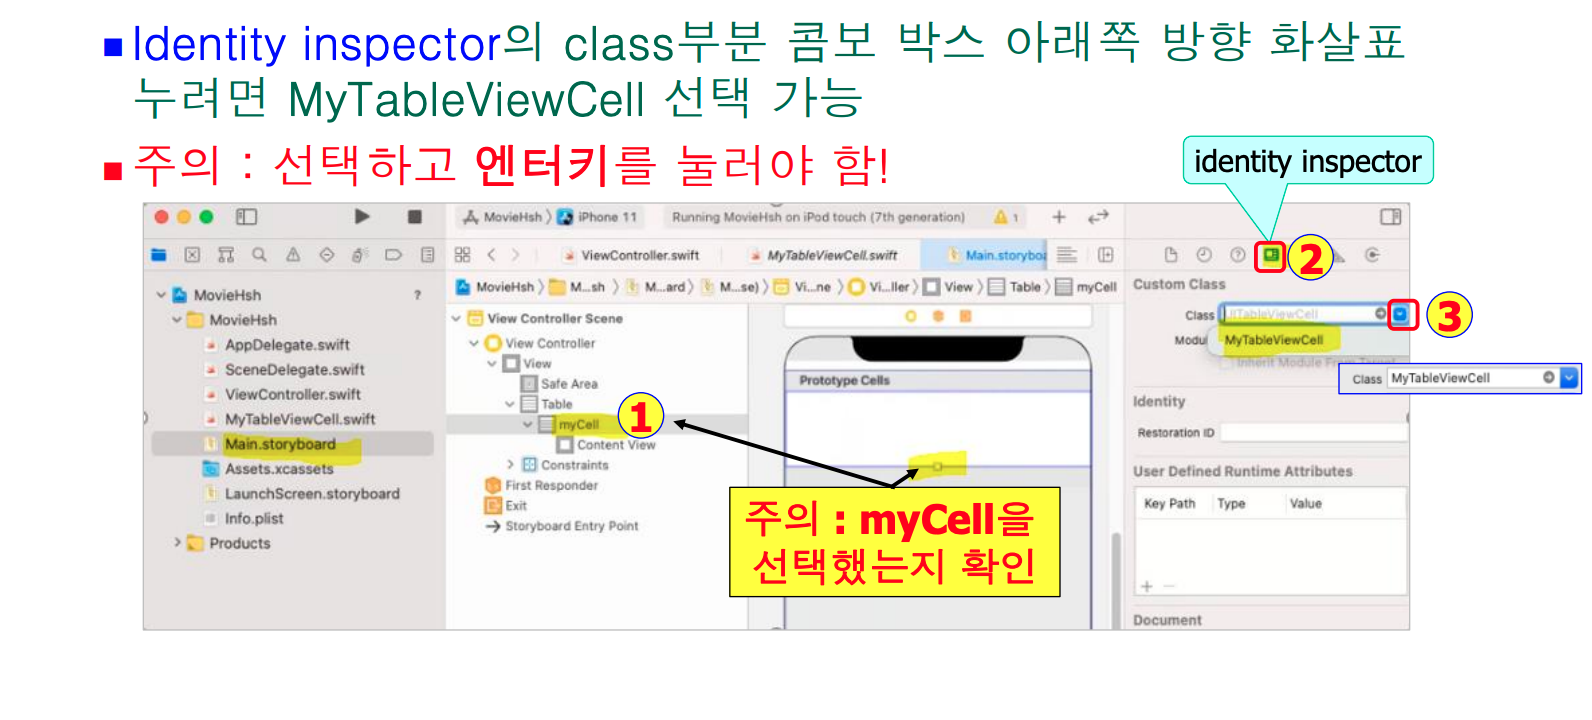
Cell을 관리할 swift파일 만들기 : Cocoa Touch Class선택

cell을 관리할 MyTableViewCell 클래스 만들기

myCell과 관리할 클래스(myTableViewCell) 연결
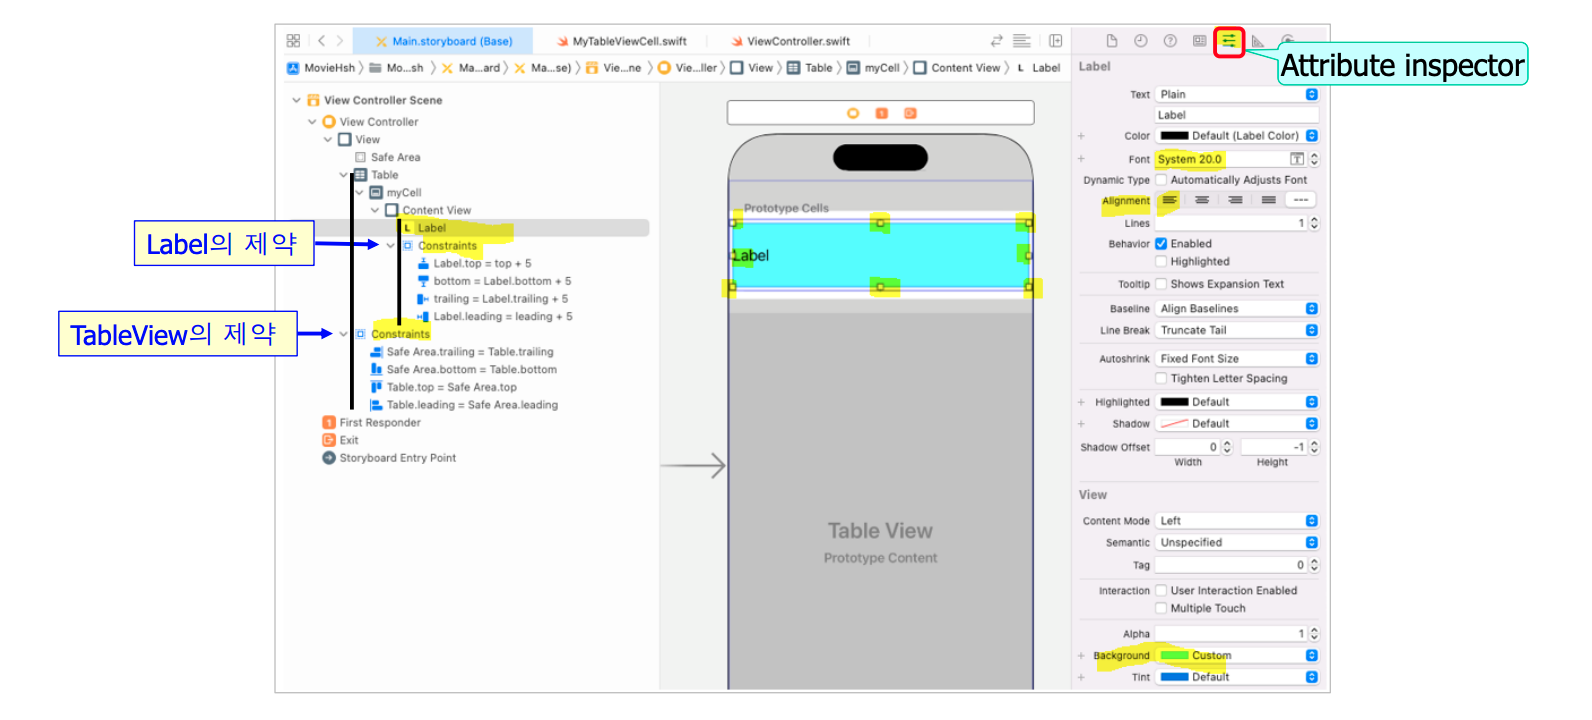
myCell의 content view에 Label추가하고 Constraints설정
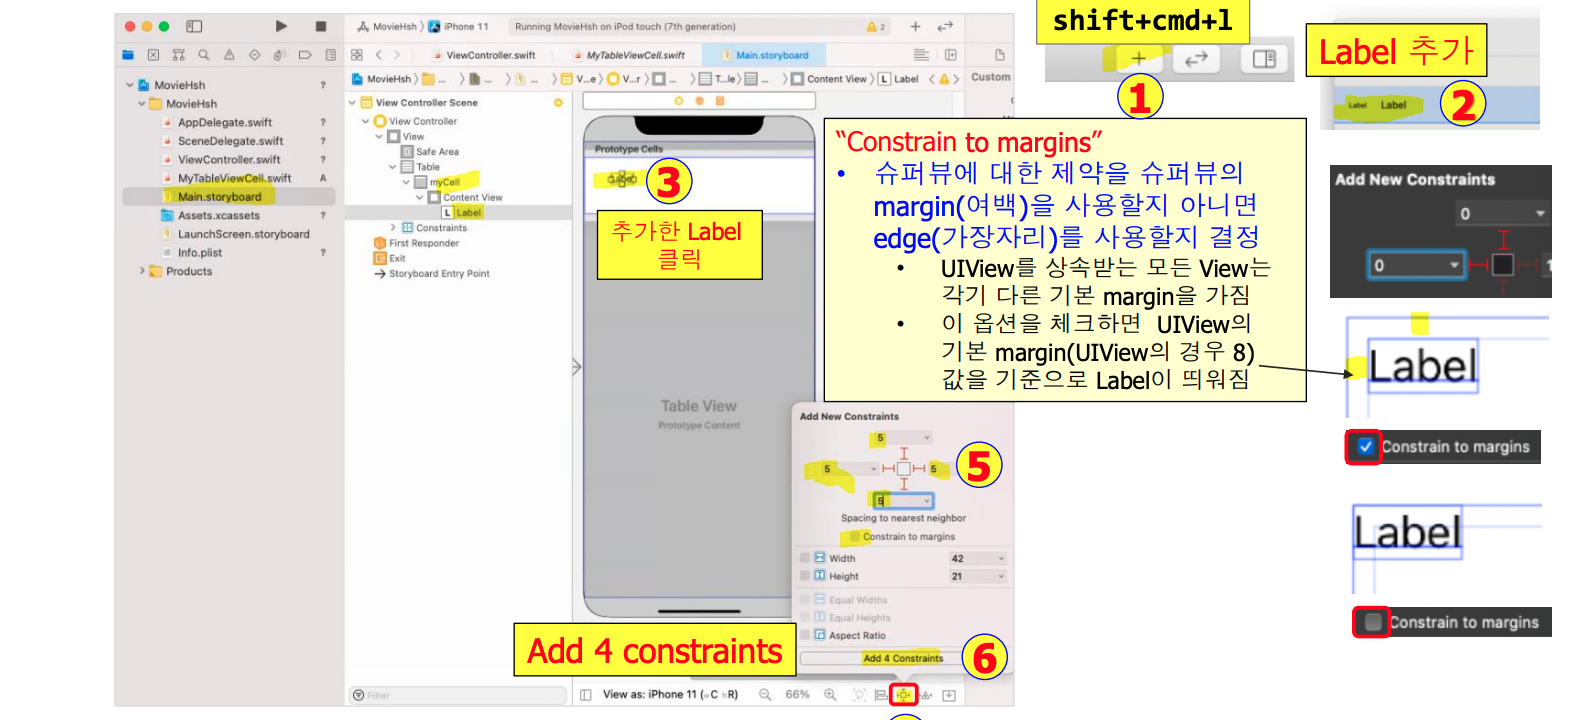
Label 디자인
Assistant editor로 storyboard와 소스 연결
원하는 파일이 아닐 경우 Automatic에서 변경
label에 outlet지정 : movieName
ViewController.swift파일 수정
tableView(_:cellForRowAt:) 수정
소스 설명
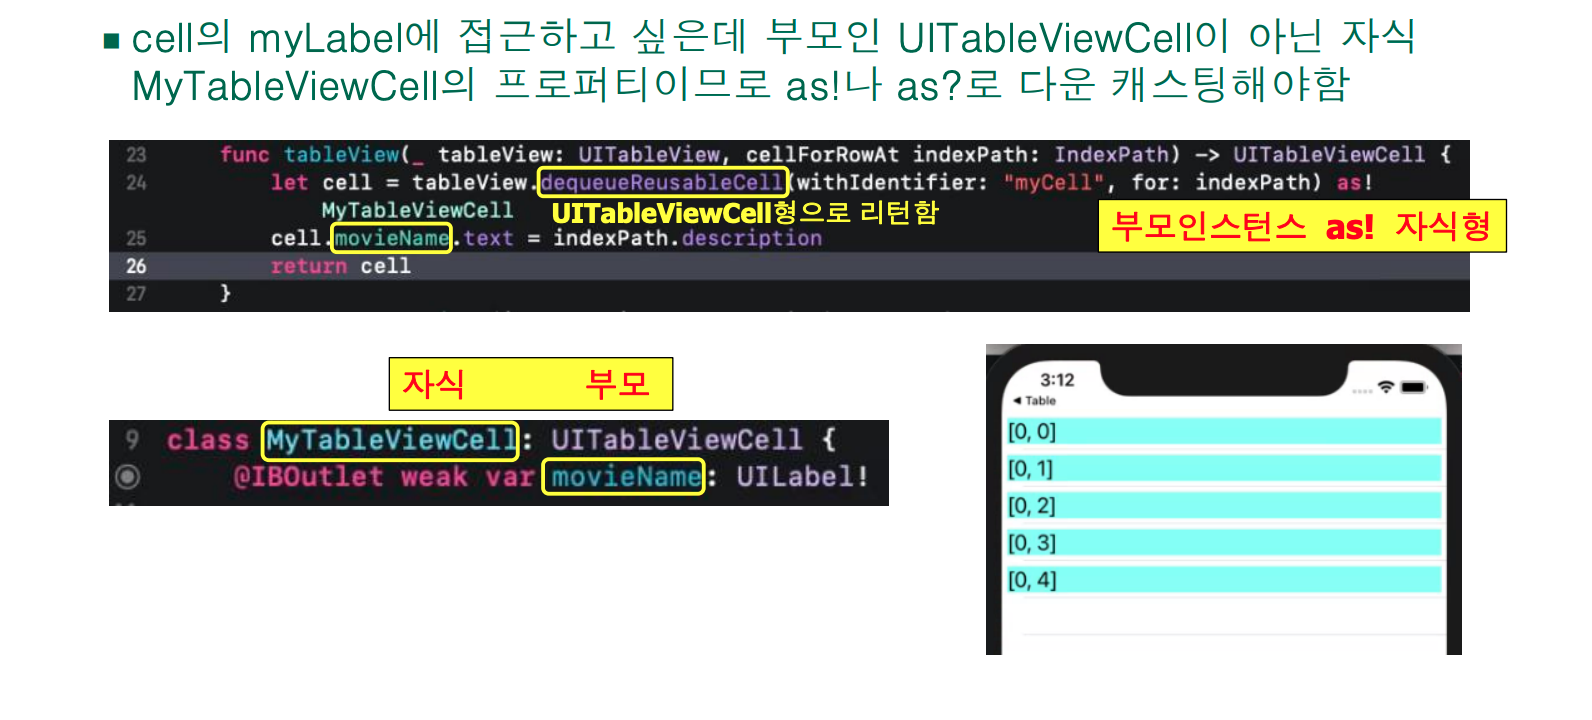
func tableView(_ tableView: UITableView, cellForRowAt indexPath: IndexPath) -> UITableViewCell {
    // 이 함수는 테이블 뷰에서 각 줄(셀)에 어떤 내용을 넣을지 설정하는 함수입니다.
    // indexPath는 현재 몇 번째 섹션의 몇 번째 줄인지 알려주는 정보입니다.

    let cell = tableView.dequeueReusableCell(withIdentifier: "myCell", for: indexPath) as! MyTableViewCell
    // "myCell"이라는 식별자(identifier)를 가진 재사용 가능한 셀을 가져옵니다.
    // 가져온 셀을 우리가 만든 커스텀 셀 클래스(MyTableViewCell)로 강제로 형변환(as!)합니다.
    // 이 셀 안에는 UILabel 등 우리가 연결해둔 UI 요소가 들어 있습니다.

    cell.movieName.text = name[indexPath.row]
    // 셀 안의 UILabel(movieName)에 텍스트를 설정합니다.
    // name 배열에서 현재 줄에 해당하는 값을 가져와 표시합니다.
    // 예: indexPath.row가 0이면 name[0]의 값이 셀에 표시됨

    print(indexPath.description)
    // 현재 줄의 위치를 출력합니다. 예: [0, 1] → 0번째 섹션, 1번째 줄
    // 디버깅 용도로 사용합니다.

    return cell
    // 완성된 셀을 테이블 뷰에 돌려줍니다.
}
네트워킹
- URL 만들기
- URL(string: String)
- URLSession 만들기
- URLSession(configuration: URLSessionConfiguration)
- URLSession 인스턴스에게 task주기
- URLSession인스턴스.dataTask(with:completionHandler:)
- task시작하기
- URLSessionTask인스턴스.resume()
네트워킹 1단계 : URL 만들기
- init?(string: String)
- failable initializer이므로 url을 옵셔널 바인딩
    func getData(){
//        if let url = URL(string: movieURL) {
//            print(url)
//        }
        guard let url = URL(string: movieURL) else { return }
        print(url)
    }
네트워킹 2단계 : URLSession 만들기
let session = URLSession(configuration: .default)
네트워킹 3단계 : URLSession 인스턴스에게 task주기
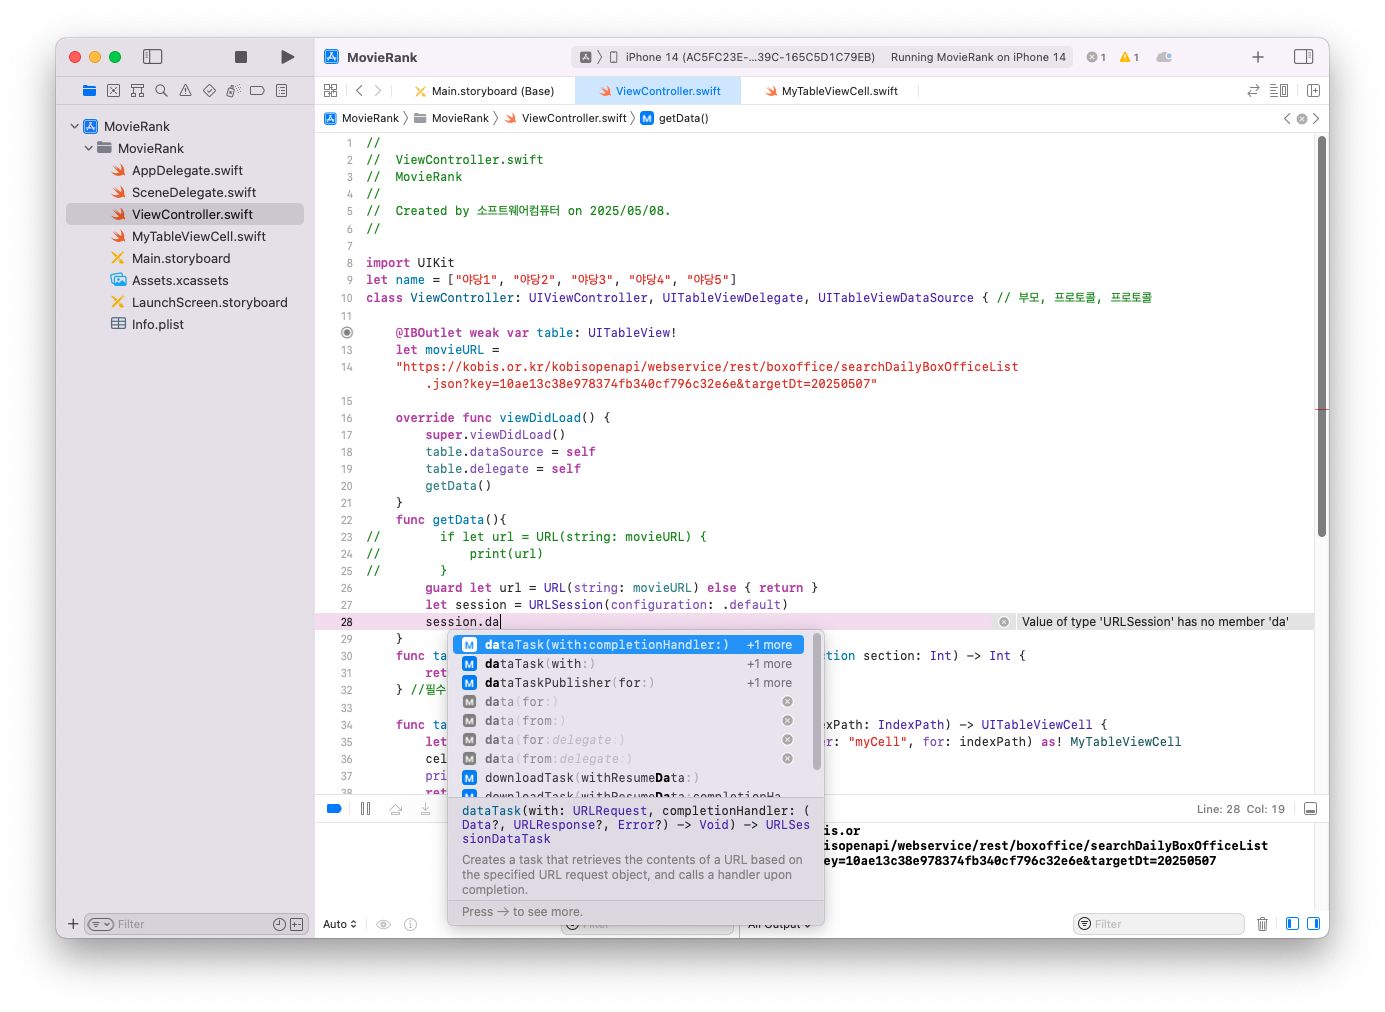
- dataTask(with:completionHandler:)
- 지정된 URL의 내용을 검색하는 작업을 만든(create) 다음, 완료시 handler(클로저)를 호출
- 클로저 앞에 @escaping 이 있으면 함수의 작업이 완료된 후에 클로저가 호출됨
- func dataTask( with url: URL, completionHandler: @escaping (Data?, URLResponse?, Error?) -> Void ) -> URLSessionDataTask
- 매개 변수
- url
- completionHandler : 로드 요청이 완료되면 호출할 클로저
- data : 서버에서 반환된 데이터
- response : HTTP 헤더 및 상태 코드와 같은 응답 메타 데이터를 제공하는 객체
- error: 요청이 실패한 이유
- 리턴값
- URLSessionDataTask형의 새 세션 데이터 task
- 작업(task)을 만든 후에는 resume()메서드를 호출하여 시작해야함
네트워킹 4단계 : task를 resume()
func getData(){
//        if let url = URL(string: movieURL) {
//            print(url)
//        }
        guard let url = URL(string: movieURL) else { return }
        let session = URLSession(configuration: .default)
        let task = session.dataTask(with: url) { data, response, error in
            print(data!)
        }
        task.resume()
}- https://developer.apple.com/documentation/foundation/urlsessiontask/1411121-resume
- 작업이 일시 중단된 경우 다시 시작하는 메서드
- 새로 초기화된 작업은 일시 중단된 상태에서 시작되므로, 이 메서드를 호출하여 작업을 시작해야함
iOS 강의 자료 참고했습니다.
'iOS프로그래밍 실무' 카테고리의 다른 글
| [iOS프로그래밍 실무] 12주차 (0) | 2025.05.28 |
|---|---|
| [iOS프로그래밍 실무] 11주차 (0) | 2025.05.15 |
| [iOS프로그래밍 실무] 9주차 (1) | 2025.05.07 |
| [iOS프로그래밍 실무] 7주차 (0) | 2025.04.17 |
| [iOS프로그래밍 실무] 6주차 (0) | 2025.04.10 |
| [iOS프로그래밍 실무] 5주차 (0) | 2025.04.03 |
| [iOS프로그래밍 실무] 4주차 (0) | 2025.03.27 |
| [iOS프로그래밍 실무] 3주차 (0) | 2025.03.20 |


